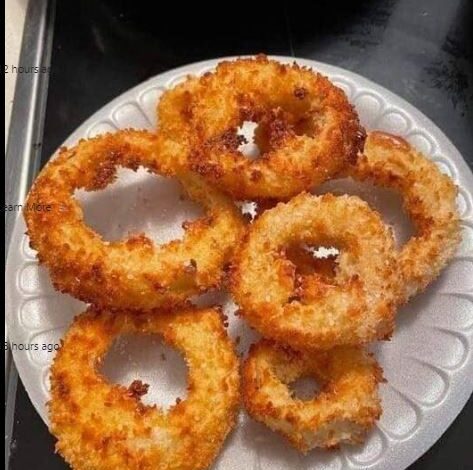
Homemade Fried Onion Rings
Instructions:
1. Preparing the onions:
Start by peeling the sweet onions and slicing them into 1/2-inch rings. Gently separate the rings and set them aside. To achieve the perfect thickness, choose onions that are neither too thin nor too thick.
2. Creating the Battery:
In a large mixing bowl, whisk together the all-purpose flour, baking powder, salt, and black pepper. The baking powder is the secret ingredient that will give your onion rings that extra crunchiness.
3. Adding Sparkle to the Mix:
Gradually pour in the cold sparkling water or cold club soda into the dry mixture while whisking continuously. The carbonation in the sparkling water creates a light and airy batter, ensuring your onion rings are gloriously crisp.
4. Optional Flavor Enhancements:
If you desire a hint of spice or added flavor, now is the time to sprinkle in a pinch of paprika, garlic powder, or cayenne pepper. These optional additions will add a delightful kick to your onion rings.
5. Preparing the Oil:
Choose a deep, heavy-bottomed pan and pour in enough vegetable oil to reach a depth of about 2 inches. Heat the oil over medium-high heat until it reaches 350°F (175°C). Using a candy thermometer ensures precise temperature control.
6. Dredging the Onion Rings:
Take an onion ring and dip it into the batter, ensuring it is fully coated on all sides. Allow any excess batter to drip off before carefully placing the ring into the hot oil. Repeat the process with a few more onion rings, but be cautious not to overcrowd the pan.
7. Achieving Golden Perfection:
Fry the onion rings for approximately 2-3 minutes on each side or until they turn a gorgeous golden brown. As you cook, maintain the oil temperature for consistently crispy results.
8. Draining and seasoning:
Once the onion rings are beautifully golden, use a slotted spoon to transfer them to a plate lined with paper towels. This step removes excess oil and ensures a light, non-greasy texture. Optionally, season the freshly fried onion rings with a sprinkle of salt to enhance their flavor.
9. Repeat and enjoy:
Continue the battering, frying, and draining process until all the onion rings are transformed into delectable, homemade treats. Serve them immediately while they’re still warm and at the peak of their crispy perfection.
Mastering the Art of Homemade Fried Onion Rings:
Creating homemade fried onion rings is an art that requires attention to detail and a passion for culinary excellence. With practice and dedication, you’ll soon achieve the perfect balance of crunch, sweetness, and caramelized flavor that defines these delectable rings.
Pro Tips for Success:
1. Choose the Right Onions: Opt for sweet onions such as Vidalia or Walla Walla, as they have a milder flavor that complements the crispy coating.
2. Keep the Batter Cold: Using cold sparkling water or cold club soda is essential to achieving a light and airy batter. The carbonation creates delightful bubbles that add to the crunchiness.
3. Perfect the Oil Temperature: Use a candy thermometer to monitor the oil temperature consistently. Maintaining the oil at 350°F (175°C) ensures your onion rings fry evenly and achieve that desirable golden hue.
4. Avoid Overcrowding: Fry the onion rings in batches to prevent overcrowding in the pan. This helps maintain the oil temperature and ensures each ring cooks uniformly.
5. Paper Towel Absorption: After frying, drain the excess oil from the onion rings by placing them on a plate lined with paper towels. This step guarantees a crispy, non-greasy result.
Congratulations! You can now make homemade fried onion rings that are just as good as anything you’d get from a restaurant. You’ve discovered a culinary gem that will wow both family and friends with the right combination of delicious onions, tasty batter, and cautious frying methods. Never forget that practice makes perfect, so don’t be afraid to try different tastes and methods to create your own special onion ring recipe. It’s time to serve these crispy treats and savor the satisfaction of preparing a delicious side dish or snack at the convenience of your own home. Have fun in the kitchen!