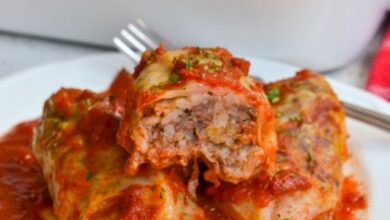
Creamed Spinach Mac & Cheese Recipe

Instructions
- Preheat your oven to 375°F (190°C). Grease a 9×13 inch baking dish with butter or cooking spray.
- Cook the elbow macaroni in a large pot of salted, boiling water according to the package instructions until al dente. Drain the pasta and set it aside.
- In the same pot, melt the butter over medium heat. Add the chopped onion and minced garlic, and cook until softened, about 3–4 minutes.
- Stir in the all-purpose flour and cook for an additional 1-2 minutes, until golden brown and fragrant.
- Gradually whisk in the whole milk and heavy cream, stirring constantly to prevent lumps from forming. Cook until the mixture thickens, about 5–7 minutes.
- Season the sauce with ground nutmeg and freshly ground black pepper, adjusting to taste.
- Stir in the thawed and drained chopped spinach, shredded sharp cheddar cheese, and grated Parmesan cheese until melted and smooth.
- If using, add the mustard powder for an extra kick of flavor.
- Add the cooked elbow macaroni to the cheese sauce and stir until well coated.
- Transfer the mac and cheese mixture to the prepared baking dish, spreading it out evenly.
- If desired, sprinkle the panko breadcrumbs evenly over the top of the mac and cheese for added crunch.
- Bake in the preheated oven for 25–30 minutes, or until the top is golden brown and the sauce is bubbly.
- Remove the baking dish from the oven and let it cool for a few minutes before serving.
Cook Notes and Variations
- For added flavor, you can add cooked bacon or diced ham to the mac and cheese mixture.
- Experiment with different types of cheese, such as Gruyere, Swiss, or Monterey Jack, for a unique flavor profile.
- For a vegetarian version, you can omit the bacon or ham and add extra vegetables, such as diced bell peppers or mushrooms.
- If you prefer a smoother texture, you can puree the spinach before adding it to the cheese sauce.
FAQs (Frequently Asked Questions)
Q: Can I use fresh spinach instead of frozen? A: Yes, you can use fresh spinach in this recipe. Simply wilt the spinach in a skillet with a little olive oil until it’s wilted, then chop it finely and add it to the cheese sauce.
Q: Can I make this dish ahead of time? Yes, you can assemble the mac and cheese ahead of time and refrigerate it until ready to bake. Simply cover the baking dish tightly with aluminum foil or plastic wrap and store it in the refrigerator for up to 24 hours. Bake as directed when ready to serve.
Q: Can I freeze leftover mac and cheese? While you can freeze leftover mac and cheese, the texture of the sauce may change slightly upon thawing. It’s best enjoyed fresh for optimal flavor and texture.
Keto and Low-Carb Versions
For those following a keto or low-carb diet, you can make a few simple substitutions to create a version of Creamed Spinach Mac & Cheese that fits your dietary needs:
- Substitute the elbow macaroni with cauliflower florets or shirataki noodles for a low-carb option.
- Use almond flour or coconut flour instead of all-purpose flour to thicken the sauce.
- Opt for full-fat dairy products such as heavy cream and cream cheese to keep the dish keto-friendly.
- Skip the breadcrumbs or use crushed pork rinds for a keto-friendly topping.
With these substitutions, you can enjoy a delicious and satisfying version of Creamed Spinach Mac & Cheese while staying within your dietary goals.
Creamed Spinach Mac & Cheese is a comforting classic that’s perfect for any occasion. With its creamy cheese sauce, tender pasta, and flavorful spinach, it’s sure to be a crowd-pleaser at your next gathering. Whether served as a side dish or as the main attraction, this dish is guaranteed to delight your taste buds and warm your soul. So gather your ingredients, preheat your oven, and get ready to enjoy the ultimate comfort food experience with Creamed Spinach Mac & Cheese.


